Having looked around at a number of different weather orientated website, and knowing that the best place for your outdoor sensor is away from objects that can affect the ambient temperature/humidity. The catch is that by having it out in the open, solar radiation (that big yellow thing in the sky) will naturally heat the outer surfaces of the sensor ultimately giving you temperature readings way off the planet, and possibly causing premature failure of the sensor.
To solve this latter problem, a device/compartment that shrouds the sensor is called a Stevenson Screen. These screens are available from a number of sources, however they can be quite pricey for what they basically are, so this is why I decided to build my own.
Parts required |
4 threaded rods approx. 40
- 45 cm in length 9 25cm Planterra Terrapot saucers 72 nuts and 72 washers No Gaps gap sealer (see notes) |
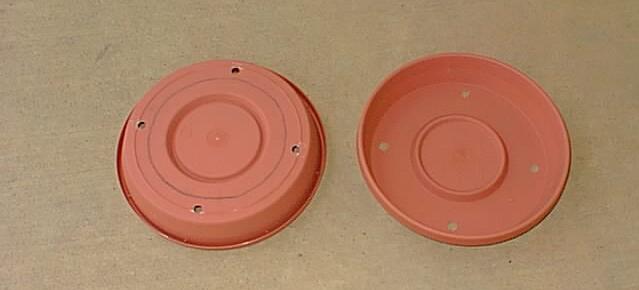 |
Mark evenly around saucer, and drill the a little bit larger than the threaded rods. This allows for a bit of movement to occur during assemly. |
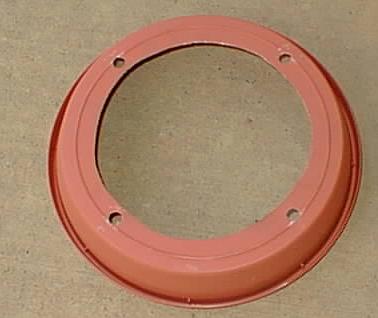 |
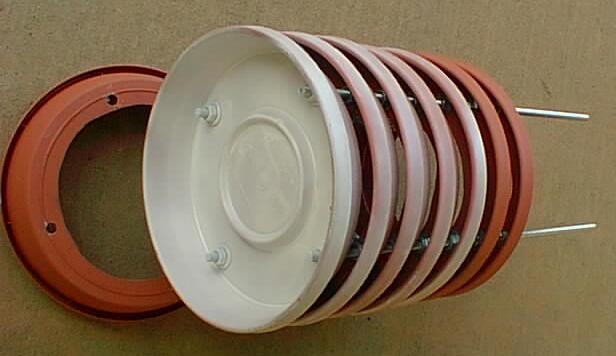
Mark a circle approximately 15cm in size, and cut out
the large opening. If you get the same saucers as I did, save two of the cut outs to help fill the centre depressions in the bottom and top saucers. |
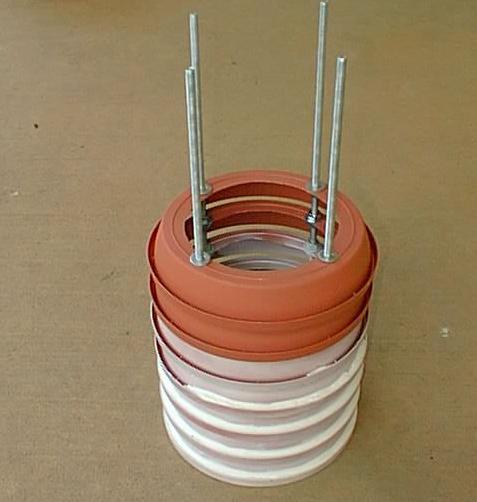 |
Assemble from the base upwards on the threaded rods. Nut, washer,saucer, washer, nut. This image shows the first few saucers assembled, with the lips partially filled with No Gaps, and painted. |
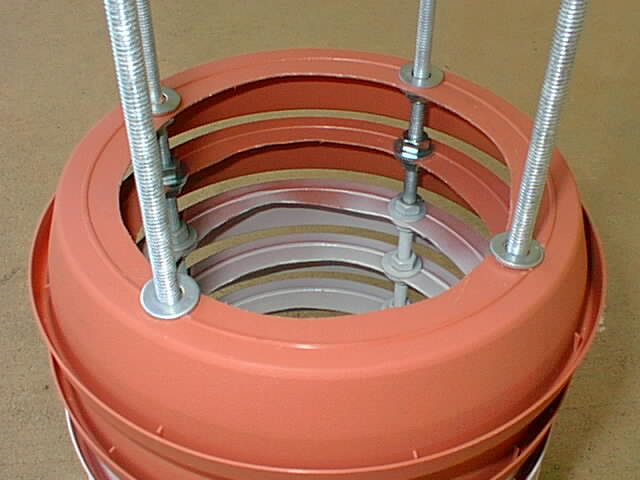 |
Note how the nuts and washers fit in together, I.E. Nut, washer,saucer, washer, nut. |
 |
The gap between each layer which needs to be there will vary according to the style of saucer that you choose to use. |
 |
In this image, the gaps that I left where around 30 to 35mm, as can be seen prior to adding the next saucer. |
 |
Prior to this stage, you should have all the saucers
paint in the shade of white that like. :-) Using 25cm saucers, the standard clip for the WMR-918/968 will fit almost in the middle of the screen.I've secured this one with cable ties. |
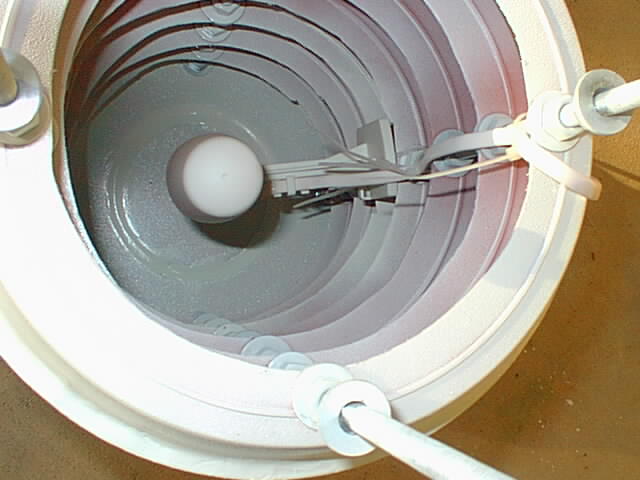 |
Clip the sensor in place, and secure cable with cable
ties. Finally fit the last saucer in place on the top. |
|
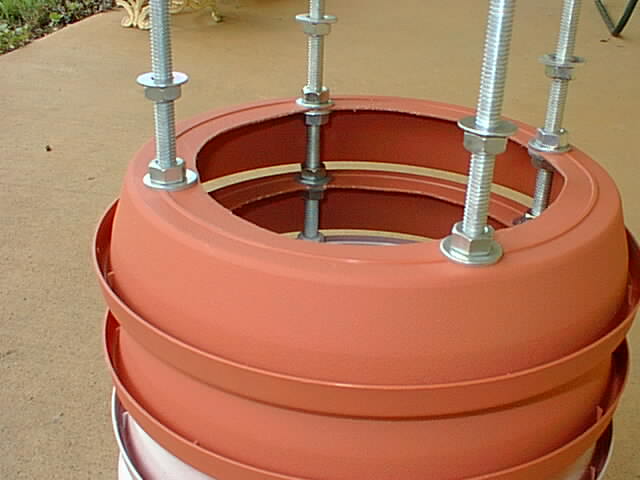
Trim two of the threaded rods flush with the top. The other two rods left long enough to secure a hanging chain to, or to bolt up to a bracket. |
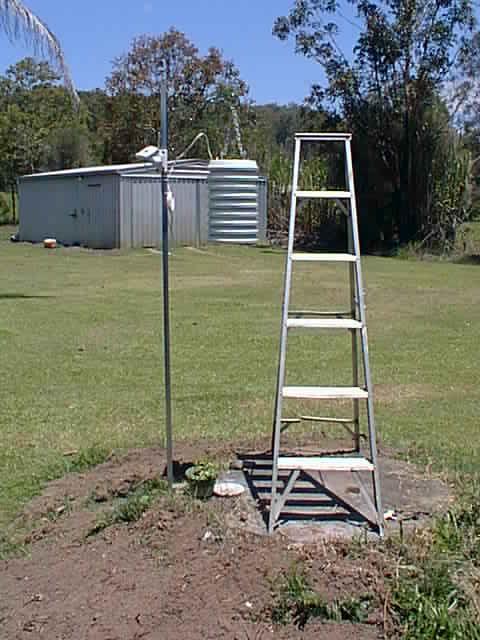 |
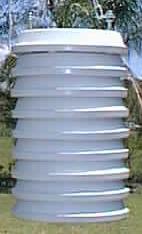
Seen here the finished item, shown with a standard step ladder to show scale and height above ground level. |
Notes:
Saucers
The saucers that I obtained have a reasonably large lip when inverted. This has the potential of filling with rainwater/condensation that will affect the humidity readings, and to a lesser extent temperature readings.
I chose to fill up these lips with a product called No Gaps , which cleans up in water until fully cured. The problems with this is that if you fill the lips up in one go, it will take days to a week or more to finally cure, which means you can't really paint the saucers until then.
One option is to mostly fill the lips with Silastic (or equivalent), which will cure much faster, and use No Gaps to smooth out the last little bits, which will cure faster due to the much smaller amount of it used.
A alternative to filling these lips would be to drill a number of small holes in the lips to let them drain by themselves. The only problem I can see here is that rubbish can build up inside the lips, detracting from the visual appearance.
Mounting and Location
I've used a short length of chain to hang off a pole with a hook, however if you leave the threaded rod slightly longer, you can bolt it directly to a bracket off the support pole.
I've located it about 1.5 M off the ground as I am led to believe that is the standard height for recognised weather stations. A few sites that I've visited myself have had theirs less than a metre off the roof of their house. It is my opinion that the inherant warmth from the house in the winter months, and the much higher temperatures in the summer months could not be adequately compensated for.
Since this page has been up, there have been many comments and ideas discussed about my screen, and some of which are quite valid.
Other sites that have made their own
South Central Topeka, Shawnee County, Kansas
Charlotte, North Carolina, USA
There have been some visitors to this Stevenson Screen page since August 1st 2004